Dagger & Bun
Now that we are familiar with Dagger and have done an initial test, let’s try it with a Bun project!
Initialization
First, I’ll use this project, which is a small Node.js library:
git clone git@github.com:Killian-Aidalinfo/lib-acl-json.gitHere’s the project link: https://github.com/Killian-Aidalinfo/lib-acl-json
Now, let’s initialize Dagger just like in the previous chapter:
dagger init --sdk=typescript --source=./daggerOnce the Dagger files are initialized, we’ll modify the package.json file for Dagger.
Here’s my package.json:
{  "type": "module",
  "dependencies": {    "typescript": "^5.5.4",    "@dagger.io/dagger": "./sdk"  },  "dagger": {    "runtime": "bun"  }}
Remove the packageManager section and add the runtime field, specifying Bun.
For more details, refer to the official documentation: Dagger Bun Documentation.
We don’t need to specify a packageManager since Bun uses its own package manager.
First Pipeline
Let’s start with a simple pipeline: install dependencies and run Bun’s unit tests.
import { dag, Container, Directory, object, func } from "@dagger.io/dagger"
@object()export class LibAclJson {  /**   * Return the result of running unit tests   */  @func()  async test(source: Directory): Promise<string> {    return this.buildEnv(source)      .withExec(["bun", "test"])      .stdout()  }
  /**   * Build a ready-to-use development environment   */  @func()  buildEnv(source: Directory): Container {    const nodeCache = dag.cacheVolume("node")    return dag      .container()      .from("oven/bun")      .withDirectory("/src", source)      .withMountedCache("/root/.npm", nodeCache)      .withWorkdir("/src")      .withExec(["bun", "install"])  }}
The buildEnv function installs the dependencies with bun install, and the test function uses this setup to execute the tests.
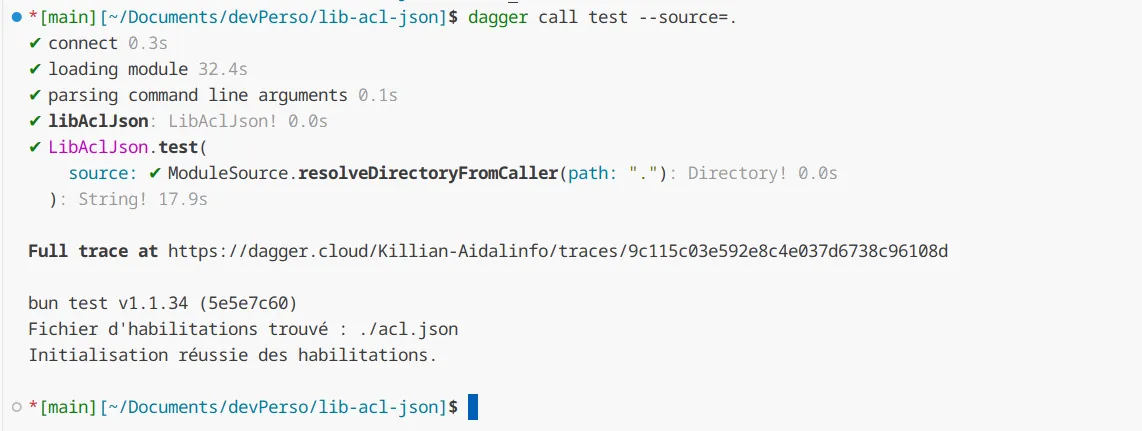
Let’s call the test function:
dagger call test --source=.
Perfect! Everything worked smoothly. 😎
NPM Publish
Now, let’s see how to use an environment variable to publish our package to NPM.
First, generate a token on npmjs.com.
Add the token as an environment variable:
export NPM_TOKEN=npm_bZZV3kQl7iVNeHmumZKcsrPpeb0dhX32M3vrNow, modify the pipeline to publish the package:
import {  dag,  Container,  Directory,  object,  func,  Secret,} from "@dagger.io/dagger";
@object()export class LibAclJson {  @func()  async publish(    source: Directory,    version: string,    token: Secret  ): Promise<void> {    // Build the source code    const buildOutput = await this.build(source);
    const publishContainer = dag      .container()      .from("node:lts")      .withWorkdir("/src")      .withDirectory("/src", buildOutput)      //Create environment variable in container      .withSecretVariable("TOKEN", token)      // Create .npmrc file      .withExec([        "sh",        "-c",        'echo "//registry.npmjs.org/:_authToken=${TOKEN}" > /root/.npmrc',      ])      // Choose the version to publish      .withExec(["npm", "version", version, "--no-git-tag-version"])      // Publish the package      .withExec(["npm", "publish", "--access public"]);
    await publishContainer.exitCode();  }
  @func()  async build(source: Directory): Promise<Directory> {    const buildContainer = this.buildEnv(source).withExec([      "bun",      "build",      "src/index.ts",      "--outdir",      "./dist",      "--target",      "node",    ]);    const outputDir = buildContainer.directory("/src");
    return outputDir;  }
  @func()  async test(source: Directory): Promise<string> {    return this.buildEnv(source).withExec(["bun", "test"]).stdout();  }
  @func()  buildEnv(source: Directory): Container {    const nodeCache = dag.cacheVolume("node");    return dag      .container()      .from("oven/bun")      .withDirectory("/src", source)      .withMountedCache("/root/.npm", nodeCache)      .withWorkdir("/src")      .withExec(["bun", "install"]);  }}
Run the publish function with the environment variable:
dagger call publish --source=. --version=0.0.14 --token=env:NPM_TOKENResult:

Check on NPM:

Great! Our package is successfully published to NPM. 🎉
As you can see, the publish function calls build to create the package, retrieves the output directory, generates an .npmrc file with the token, and publishes the package with the specified version.
To use environment variables, use the syntax env:VARIABLE. You can also use a file. For more information, check the official documentation: Use Secret Variables.
Conclusion
Now that we’ve seen how to integrate Bun, you can create pipelines with Dagger and Bun. 🚀
Next step: build and push a Docker image to a private registry!